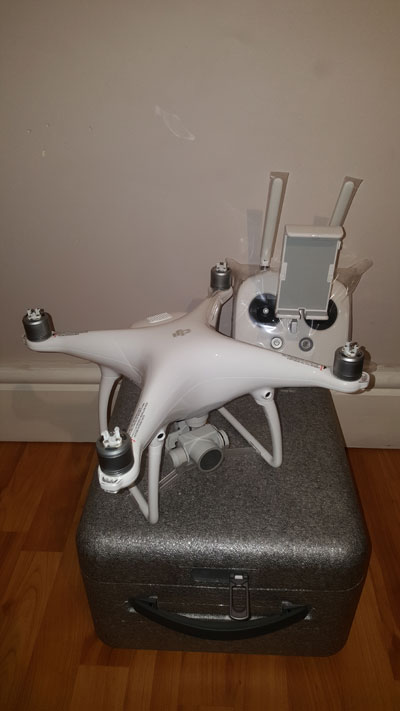
In this guide you will find all the information you need to set up, fly, and maintain your new Phantom 4.
The phantom 4 is a slightly different beast to it's predecessors, so it is VITAL you READ THE INSTRUCTIONS AND USE YOUTUBE TUTORIALS!!!!
The Basics
If this is your first time flying Drones, please read the 'Know Before You Fly' instructions that come with the Phantom 4 so you get familiar with the rules on safe flying.

The Phantom 4 will come with everything you need to start flying, other than a mobile device. To see what devices we recommend for use with the Phantom 4, you can visit the DJI website for more info. The first thing that you need to do before anything else is download the DJI Phantom 4 app from the Apple App store or Google Play store. Once the app is done downloading, open it up and create a DJI account, or sign in with your existing account (if it asks you to).
Now that the app is installed, you can start getting the Phantom ready for it's maiden flight. The battery should already come 50% charged to keep it in good shape while in storage, but you should charge it to 100% before flying. To charge the battery, just plug the power supply into the wall and then plug in the battery using the larger connector on the cord. If the Phantom 4 remote needs to be charged, plug it in using the smaller connector. When the battery is done charging, the indicator lights on the battery will turn off. The same thing will also happen on the controller when it’s done charging.
Then plug the mobile/tablet device into the Phantom remote using the included micro USB cable or an Apple Lightning cable. Turn the controller on by tapping the power button once, and then holding it down. Once the controller is on, make sure that the plastic camera holder is removed from the landing gear, then turn the Phantom 4 battery on by tapping once and holding it down (just like on the remote).
The Phantom 4 will boot up and you should hear 3 beeping sounds coming from the motors. If you go into the DJI Go app and press the camera button, you should also see a live video feed coming from the drone. A menu should automatically pop up called Aircraft Status. This is where you can check the status of all the sensors, update in firmware or any abnormalities to make sure everything is functioning properly. If everything is normal (with the exception of the compass), you’re ready to go outside for your first flight, but please bear in mind that firmware updates are likely to be needed!!
Firmware updates

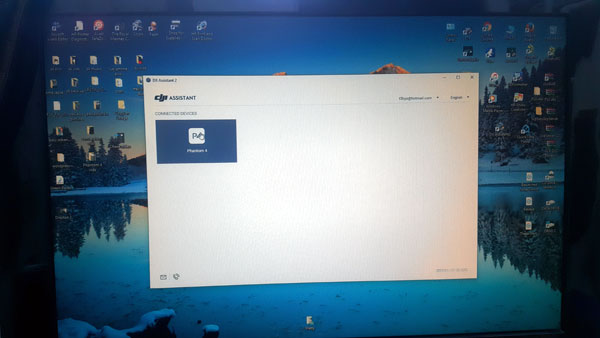
If firmware updates are needed, then get on your P.C or laptop and enter the download section on the DJI website for the phantom 4, and download to your P.C or laptop the assistant software which will be either ZIP or EXE.
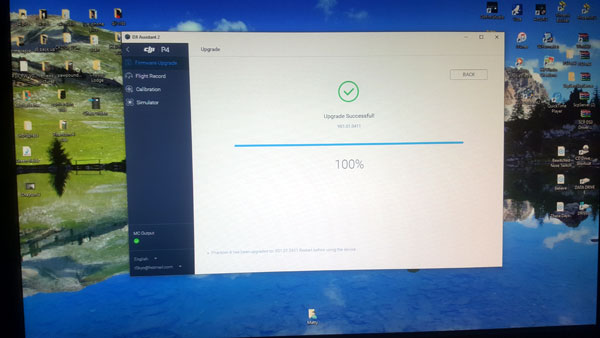
Once that is installed on your PC, you can then turn on your phantom 4 (REMEMBER NO PROPELLERS SHOULD BE ON BEFORE A FLIGHT!!), plug your Phantom 4 in to the computer via the USB cable and click PH4 on screen. This will access the flight system within the drone and allow you to perform firmware updates. IF, the update does not work, please make sure you are plugged into a 'USB 2' port and NOT 'USB 3' as the phantom does not like USB 3. (USB 3 is easily identified by the blue block inside the terminal)

At this point, your downloads should have installed and you should be then ready to update your handset via the DJI GO app. To update the handset please follow the update instructions given in the app via 'aircraft status'.
Getting Ready For Takeoff
Once you have an open space outside for your first flight, you can perform a 'compass calibration'. All GPS enabled drones have digital compasses, which tell the drone what direction it’s facing. Just like a traditional compass, digital compasses are extremely sensitive to magnetic interference. This is why we strongly recommend that you calibrate the compass before every flight in a new location, or if you have metal objects near the drone. The Phantom 4 remote also has magnetic components inside, so you should try to keep the remote more then 2 feet away from the drone during and after calibrating the compass.
To calibrate the compass, enter the 'Aircraft Status' menu located at the top of the screen in the DJI Go app. Press the calibrate button, then press Ok to continue. Once the lights in the back turn solid yellow, rotate the drone 360 degrees horizontally in a clockwise orientation until the lights turn solid green. Then rotate the drone 90 degrees vertically (so the front of drone and camera are facing downwards) until the lights in the back start pulsing green. If the lights flash red, try recalibrating again.
Only after you have a recorded GPS home point (indicated by the flight assistant voice) please mount the propellers. Two of the props will rotate clockwise and the other two will rotate counter clockwise. To match the props up with the right motors, there are black rings on two of the props which should match up with the black dots on the motor mounts. With the newly designed propellers on the Phantom 4, all you have to do is push down and twist them by about 45 degrees and they will lock in place.
Flying For The First Time

Finally, we are now ready for take off! As long as the back lights on the Phantom 4 are still pulsing green and the app says “Safe to fly (GPS)” then you’re good to go. To arm the motors, push both sticks on the controller down into the lower corners that are closest to each other. This will make the motors spin for a few seconds at a low speed until you decide to take off. If you don’t increase the throttle within a few seconds, the motors will turn off again. You can also use the take off button located on the left side which will make the drone automatically take off and hover. The 'auto take off' feature works nicely, but I recommend using the traditional arming sequence (at least for your first flight) to make sure that the motors are spinning properly.
Once you are airborne, gently use the control sticks to see how the drone reacts to different inputs. Pushing the left stick up and down controls how high the drone will go, while pushing it left and right will control the rotation on its axis. At the same time, pushing the right stick up and down will make the drone go forward and backward, while pushing it left and right will make the drone bank left and right.
Landing is just as easy as taking off. You can tap the return home/land button on the left side of the screen, or land manually. If you want to land softly, slowly push down on the throttle stick to lower the drone to the ground. Once it touches the ground, immediately push the throttle stick all the way down until the motors turn off.
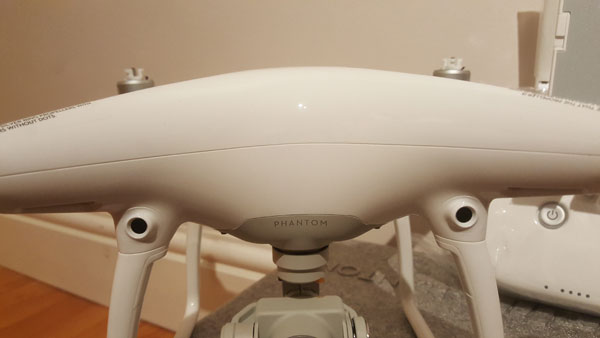
The Phantom 4 has collision avoidance camera on the front and the underneath of the machine. These are used to detect solid objects and react to them by stopping the drone crashing into them. They work great provided they have been calibrated correctly....which is down to you! To do this, get the phantom back on the assistant software and enter the calibration tab. This will have simple to follow instructions on how to calibrate the collision sensors.
As always, if you need any help on getting up and flying, please call the Wheelspin team on 01543 577278, as we will always be happy to help!
Happy flying, and remember to fly safely and responsibly.


